Crash Course: How to Teach Piano Online
What you have been wondering and perhaps worrying about for many years is suddenly upon you. The question was if online piano lesson are worth it and if so, how to get started? Now there is no more time to ponder, this week you will be teaching all your piano students online!
To keep updated, sign-up for our free newsletter here >>
Let us know how things are going for you at the moment by post your experiences, suggestions and questions in the comment field at the bottom!
And help spreading the information by linking to the article on:
https://www.pianostreet.com/teach-piano-online
While you could spend the remainder of this school year investigating and planning for the optimal way to teach piano remotely using various online tools and adjusting your educational approach and content accordingly, it will still not be close to a physical lesson. But online teaching will have both advantages and disadvantages, and as a piano teacher your creative and pedagogical skills will surely help you make the most of the advantages.
This article covers many obvious things, but the aim is to quickly introduce you to the current consensus around the basic concepts of online piano teaching and not least, to help you get your online teaching started today!
Are you ready for the crash course?
Level 1: Just do it!
The best piano lesson?
The lesson that actually takes place. (Any lesson, physical or online is better than a cancelled lesson.)
The best technical devices and equipment?
The stuff you and your students already own.
The best platform?
The one you and your student already use or can easily start using.
The best outcome?
You assist and inspire as many of your students as possible to continue practicing during a time of social isolation.
We suggest that your main goal for the first week is to get started immediately with what you have. Follow up each student’s progress and encourage them to continue practicing.
What not to expect at this level:
– Good sound quality
– Sharing sheet music and annotations on screen
– Multi camera setup
– Working with tone quality
– Giving detailed feedback about interpretation
– Introducing new complex concepts and techniques
Problems to accept:
– You cannot play together due to the time delay (often up to 1 second).
– Quality of the video call may vary and you might have to disconnect and use an alternative platform during the lesson.
A minimal setup
Since your highest priority is to connect and communicate without too much preparation and practical problem solving, we suggest you get started with this simple setup.
Devices and platforms
Both you as a teacher and your students use the following:
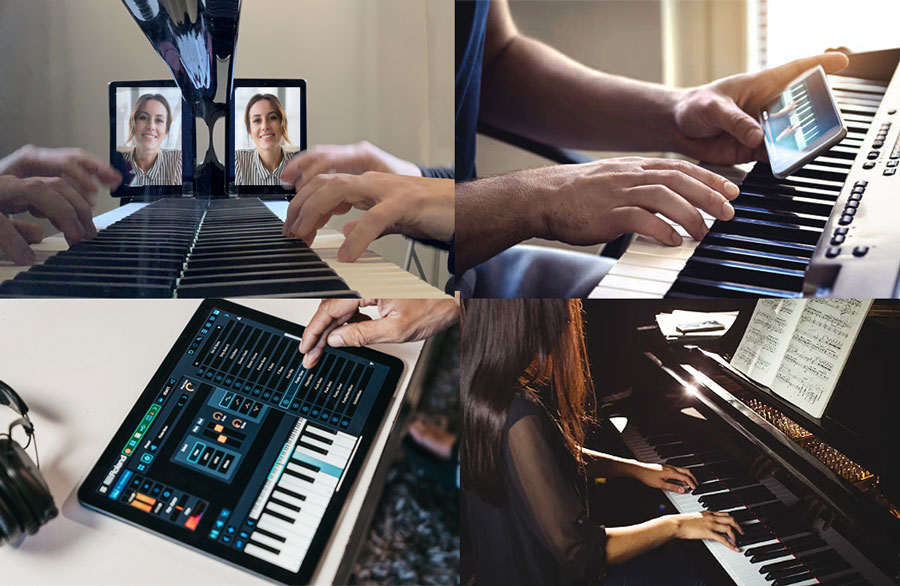
– A smartphone, tablet and/or laptop that you already use
– Facetime, Skype, Zoom, WhatsApp, Snapchat etc.
Since all your students are likely not using the same platforms you should install and setup accounts on at least two different platforms.
Facetime – often decent quality, but can only be used if both you and your student have Apple devices. It is simply a video call.
Skype – quality can be very varying due to wifi connections etc. You can keep up the conversation between lessons in the chat where you can send text, sheet music, assignments, images and video etc.
Zoom – similar to Skype but as a dedicated online conference and education solution, it has features for scheduling lessons. Most students are not familiar with it and you will be more locked into a “walled garden” compared to the other platforms.
WhatsApp – many users have it and as with Skype you can share different kinds of content.
Snapchat – since most kids use it, it is good to have as a backup solution.
Voice call – a simple phone call should not be underestimated. It is the clear winner in terms of accessability and if you know your student well, you can easily conduct a useful lesson that keeps the student on track.
Instruct the student to place the smartphone in a vertical (portrait) position at the end of the keyboard. Attach it with adhesive (e.g. Blu Tack) or tape.
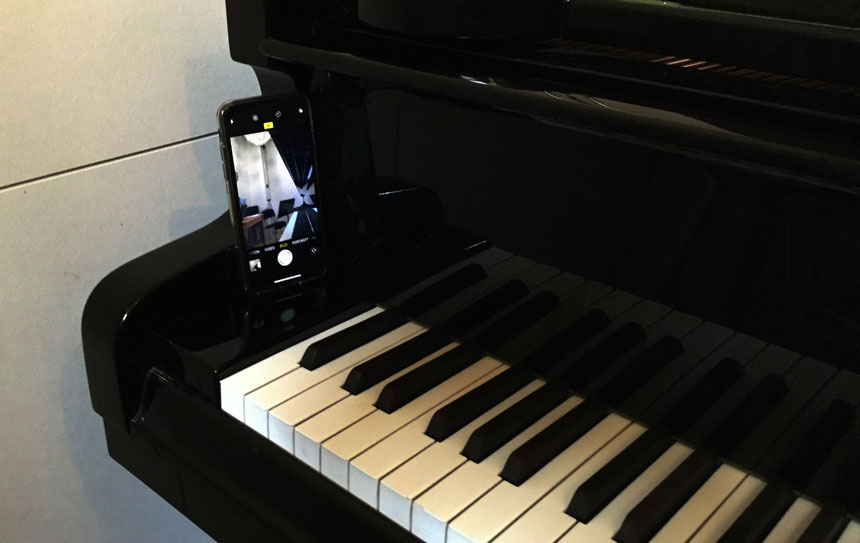
You can also opt for horizontal video, but you need to decide which of the two to use. For smartphones with small screens, vertical as in the picture above is recommended but if you both use laptops, horizontal is the natural choice.
As a teacher it is useful and practical to use two devices. For example a smartphone for the video call and a laptop for keeping notes in an e-mail or shared text document.
Turn off any sound enhancements, auto mic adjust and “mirror image”.
Planning and following-up
As an alternative or complement to the student’s physical notebook, use either one e-mail (that you both keep replying to between lessons) or a shared Google Doc file. Before the lesson, list the following:
– Lesson time
– Your accounts on the various platforms and the preferred one for this lesson
– Lesson content in bullet form
During the lesson you can make notes for the students and finish by setting up the time and lesson content bullets for the next lesson.
Quick tips:
– Follow the same routines as your physical lessons.
– Have simple goals with each lesson.
– Look at the camera to create a sense of eye contact with your student.
– One thing at a time. Do not talk while you or the student is playing.
– Real-time instructions or counting the beats while the student is playing are delayed, which will be very distracting.
– Give more responsibility to the student. For example let them make notes in their score or judge for themselves if the balance between hands is good.
– Keep in mind that a significant part of the gains with having a piano lesson is that the student keeps practicing to prepare for the lesson and get a new assignment to continue practicing.
Getting to work
Before you quickly jump in, a word of warning:
You will probably need to install new apps and software, sign-up for new services, and encourage your students to do the same. Be aware that depending on your circumstances and experience there may be online security and privacy issues that you may need to consider carefully.
1. Try out two different video call platforms and practice your app skills (chat, post a file or image).
2. Figure out how to position/mount your device(s) and work on your filming skills (switch between front/rear camera etc).
3. Set-up a shared document or e-mail for each student with the content mentioned above and send it over to your students.
4. Read this article and this to have a better chance to avoid embarrassing beginner mistakes. Prepare your family members if you are teaching from home!
5. Wait for your first call!
Level 2: Adjust your content and method
When you have been able to connect and communicate with your students in real time you will probably see obvious room for improvement in many areas. Your priorities will depend on your situation, so need to evaluate your experience from level 1 in order to set up your prioritis for your next steps as an online piano teacher.
While a very reasonable reaction is to start thinking about improving the (sometimes terrible) sound and video quality with better technical equipment, consider that it is not only you as a teacher that need a better camera, microphone, tablet etc. but all your students also need to level up their gear in order for you to benefit from it.
Instead, your time is now probably better spent to pragmatically consider which type of lesson content and methods are the most effective and useful in this new situation.
You may now need a good service for publishing and viewing videos privately. YouTube is the superior market leader for two reasons: it works great and it is free. Get an account and consider asking your students to do the same if you want them to send/share videos.
Here are some thoughts to get you started:
“Flipped classroom” approach
Give students material to learn on their own (video courses, printed material, apps etc.). During live video lessons you assist them by helping to solve the problems they have encountered.
“Video exchange” approach
The student is asked to record a video of their piece or other assessment and send it to you. You can get back with written comments in an email, or with a short video clip with comments and instructions. Videos recorded and posted will almost always be of considerably better quality than a real-time video call. It is not unrealistic to assume that the student might be even more motivated and dedicated to playing well in the video recording than when just practicing for the ordinary lesson.
Here are more invaluable tips about content, techniques, and routines for online piano teaching that has recently been shared on YouTube by piano teachers.
Top Music: 5 Quick Tips for Producing Video Piano Lessons Online
The Clarion Clavier: How and why I teach piano lessons online through Skype
Curious Piano Teachers: Your Essential Guide to Giving Online Piano Lessons
Helpful articles to read:
Clavier Companion: Teaching in the time of Covid-19
Tim Topham: On How to Maximize Your Effectiveness When Teaching Lessons Online
Color in my piano: Teaching Piano During the COVID-19 Pandemic
Level 3: Improved Technology
Now you are ready to explore the many ways of improving the technological side of your online teaching.
While you can quite easily gear up to deliver impressive multi-camera lessons with great sound on a budget below $3.000, before you jump in, take a moment to consider a few things:
– You can not expect all students to invest in quality gear. They may still use their smartphone with a small screen and poor audio (both microphone and speakers).
– If your online lessons are too impressive, it may not just be the temporary solution that you had in mind. Students and parents will get used to the new situation and it is easy to imagine that they will in many cases prefer and require online lessons even when the period of social distancing is over. Are you really ready to give up physical lessons?
– Just to physically set up the technical gear for high-tech multicamera lessons does take time. If you use a proven setup that you have been working with before, you should still expect an hour to get camera stands, mic placement, hdmi adapters, audio mixer, camera angles, device charging and a lot more to be in place. Unless you have a dedicated online piano lessons studio where you can keep the setup intact over time, you may have to spend a lot of time rigging up and down.
If the above points cannot hold you back, get started by listening to some piano teachers with long experience in this area that we have found sharing their tips on YouTube:
Josh Wright: 15 Tips For ONLINE Piano Lessons (filmed during COVID-19 quarantining)
Hugh Sun: How To Teach Online Piano Lessons
Stay in Tune with the Piano World
Join over 70,000 piano enthusiasts and get our exclusive monthly newsletter filled with classical piano news, inspiring articles, sheet music and other resources.
It’s FREE to join, and you can unsubscribe at any time.
Comments
Thank you so much for this great collection of tips! I guess we are all learning to use techology in a new way at the moment but this was really helpful. I am starting out by using the simplest methods and tools. It is for sure not good but much better than nothing.
I find the advice very accurate and close to my own experiences. I try to keep it simple and let the students take greater responsibility of their own work. It is worth mentioning that at least in my country and area I can not expect all students to have a broadband internet connection at home. Some of them only have mobile phone data with limited monthly plans which is not enough for online video.
I guess have to figure out a solution for them, but what’s said about a simple phone call is worth to try in those cases.
Thanks very much for these tips. I have been wondering how to make a start and your suggestions are most helpful.
Last week I started giving lessons online, mostly using Facetime and Whatsapp. It works reasonably well with older and advanced students and some of the younger will have to take a break for a while. It would simply take too much effort to get the online and prepare the lessons to work well in the new situation. I am planning give them theory work for now but must find some good material. Really waiting to get back to normal work in my studio… Good luck everyone!
great article, thank you! i have been very much against the idea of online teaching… in my area i can still give normal lesson and still do with some of my students but many have opted to cancel their lesson or asked for online lessons instead. i have successfully used piano street’s instructive editions in the past and find them a great solution for online teaching. i can then work more like the flipped classrom and exchange lesson formats mentioned in the article. send them the instructive score with the practice guide and they can easily get started with the piece on their own. in a video call i do not need to show and explain everything, i can just help them solving their problems. i hope you can add even more pieces with instructive editions in the members area!
Thank you for all the info , was very helpful! I would like to receive any other info about this topic
Thank you so very much. Great information. Great advice.
All very helpful ideas. I’ll be launching into this method of teaching today so I feel slightly uncomfortable but also positive, having done a trial run with all my students last week using the platforms they preferred – FaceTime and Zoom being the most popular.
Thanks, this is very helpful and supports what I am already finding out. I did invest in a simple set of earbuds with mic attached (the kind that comes with an iphone) because after one week of teaching online I found I was losing my voice. This is because of me trying to “project” myself through the time and space to them. I realize it will take me some time to adapt to this alien format– speaking more succinctly, for one. The microphone should help.
Does anyone have any suggestions about setting up a Youtube channel to post videos of my students playing their recital pieces? I have posted on Youtube before, but I’m wondering it I need to ask them to submit a certain type of file. Also, I assume they will have to send me their videos and then I will have to post them to the Youtube channel.
Best wishes to all teachers and students who are working hard to adapt to our new circumstances and continuing to progress and to enjoy music!
Hello and thanks for so many helpful inormation!
I’ve been asked by the AEC (Association Européenne des
Conservatoires, Académies de Musique et Musikhochschulen) to prepare a “Guide for Dummies: How to do a distance lesson for music instrumental teaching”. If you are interested, you can find it at http://www.aec-music.eu
and the Italian version.
If you think it can help, please feel free to share
Great article, thank you! I love the ‘Just do it’ part, where you just start with what is already there. This removes so much of the hurdle to actually get started and leave the technical details for later!
Thank you! This is really useful information.
Teaching and learning online certainly has its challenges, but it is and can be a great way for everyone to get access to a teacher. Sometimes you just need to jump in and give it a go.
I want to record some lessons and then sell them to anyone who wants to buy it. What about the copyrights of the music that is being played in those videos? Does anyone have experience with this?